
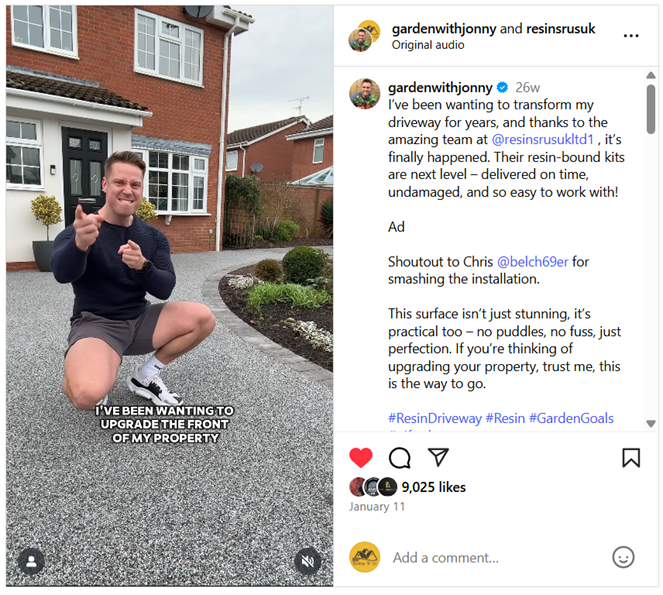
Longtime followers of Jonny Hincks – a self‑taught gardener, firefighter, fitness‑fan, and all‑round green‑thumb comedic relief – know he’s never one to shy away from a challenge. As he often quips: “There’s always been a part of my garden I’ve hidden away…a space I’ve been embarrassed by for years.”
For years he drove over loose gravel and pitted concrete. But Jonny teamed up with us to give his driveway a sleek, permeable finish using resin-bonded gravel. From start to finish, it was a journey in transformation and inspiration.
- Choosing the Right Materials
Jonny chose a resin-bonded surfacing kit from Resins ‘R’ Us – top quality, water-permeable, and UV-stable. “Here’s the resin kit, top quality and ready to go,” he revealed in an Instagram reel, showing himself mixing aggregate and resin by hand .
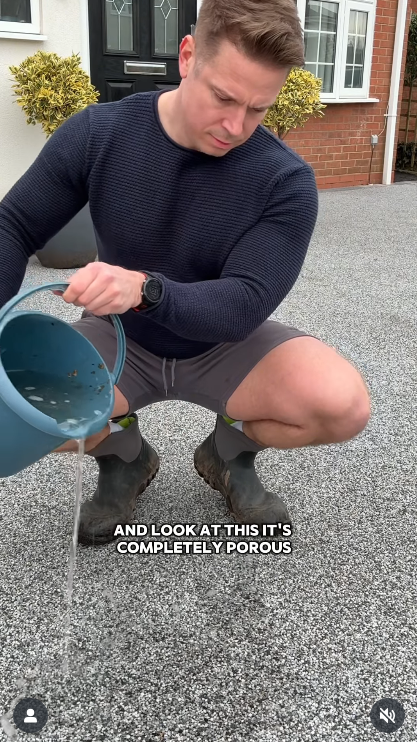
Resin-bonded surfaces offer a smooth mortar coat that encapsulates decorative stones and allows excellent drainage; a perfect fit for gardens like Jonny’s in Warwickshire, where rainy weather is the norm.
- The Installation
Surface Prep
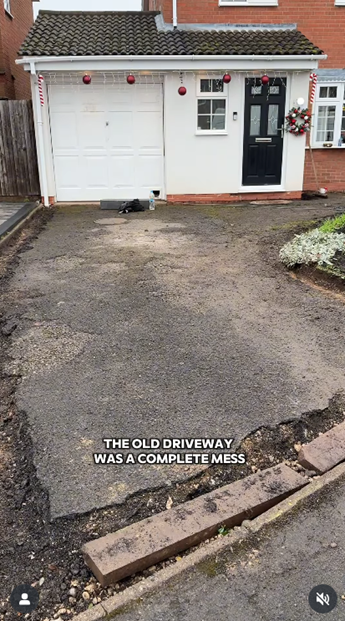
The winter timing was strategic. Contractors started by pressure-washing and sweeping away loose stones and debris before priming and levelling the concrete base.
Mixing & Laying
With gloves and buckets, Jonny and the crew mixed aggregates into resin, aiming for that perfect stone-to-resin ratio. Then, they trowelled the mix across the concrete substrate, smoothing it into a continuous finish.
Curing
The resin cured under cold, but not freezing, conditions. Within hours, the surface was firm enough to walk on, and after a day or two, ready for light traffic.
- Aesthetic & Functional Gains
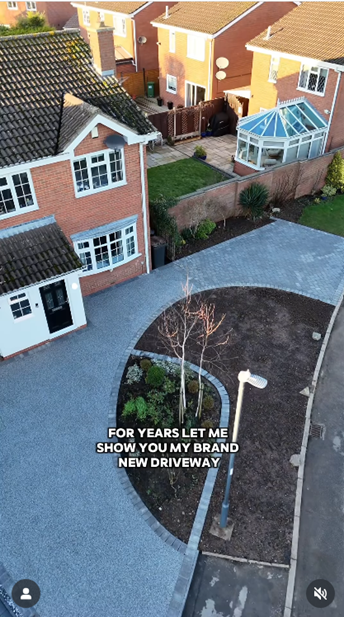
Before, the driveway was drab and patchy; loose, slippery, and accident-prone. After, Jonny’s front entrance – and his IG grid – was spring-ready. He calls it a “much‑needed reset.”
The new surface is:
- Permeable and SUDS-compliant – fulfilling modern drainage standards
- Low-maintenance – a quick hose-down keeps it pristine
- UV-resistant – it won’t fade with sun exposure
- Visually cohesive – chose a natural tone that complements his brickwork
- The Follow‑Up Garden Extension
A few months later, his creative spark reignited. The front driveway finish blended so well with his gravelled side garden that Jonny decided to bring the resin to a hidden corner he’d long neglected. This follow-up project extended the resin surface into a small courtyard at the side of his home.
Why it packed a punch:
- Unified Flooring: it visually tied the driveway and courtyard together, creating a seamless flow.
- Entertaining Space: with gravel sealed, it became a clean, stable area for setting up plant pots, a folding chair, and even warm fairy lights for evening hangs.
- Plant-friendly edges: Jonny subtly edged the resin path with low box shrubs and spring bulbs – maintaining his characteristic seasonal flair.
During the second reel drop, he joked: “I’ve finally done something I can be proud of with this hidden garden corner.”
- Jonny’s Top Tips
Throughout his two-part project, Jonny highlighted key lessons:
Timely installation matters – resin laid in January cures well in damp conditions, and avoids summer heat that might make curing too quick.
Go modular – start with the primary path; refinish adjoining areas once the main section has settled in.
Select aggregate wisely – Jonny chose a neutral, mid-tone chip that complements his red brick and green plantings.
Mix by eye and feel – aim for a crumbly yet cohesive texture before laying.
- Reflecting on the Impact
By mid-summer, Jonny’s driveway and courtyard are living proof that our quality materials combined with thoughtful garden design can elevate not just function, but aesthetic and curb appeal.
Feedback from fans has been positive:
- Many said they felt motivated to improve neglected tarmac or patchy patios in their own homes
- The project serves as a compact example of a residential-scale SUDS-friendly renovation
- Jonny’s humour and transparency created authenticity – no disguised brand promo, just a gardener excited to share
Jonny’s story is a blueprint for any installer to market their projects as case studies on social media.
Here are our tips:
- Use resin-bound surfacing for durability, permeability, and aesthetics
- Start seen, expand unseen: begin with high-visibility areas, then extend once confidence builds
- Combine hard surfacing with edge planting to soften the scene – he used bulbs and box shrubs to great effect
- Document the journey – Jonny’s reels resonate because they show honest progression

From Driveway to Destination
Jonny Hincks didn’t simply lay new paving; he turned an underappreciated space into a clean, attractive, functional entryway that wraps into his living garden. The follow-up in his hidden courtyard reaffirmed that gardens aren’t just outdoors – they’re seamless design experiences.
For gardeners and installers alike, the lesson is clear: a well-chosen resin-bound kit – especially when paired with a garden-minded edge, can transform grey concrete into a canvas for nature and lifestyle.
Follow Garden With Johnny on IG to catch upcoming “low-budget low-labour” garden challenges that prove that with elbow grease and creativity, no space is off limits.”
Special thanks to Jonny for showing that you don’t need acres to grow greatness.
Jonny’s driveway before & after:
Planning a resin driveway?
👉 Contact our team today on 01508 500888, email sales@resinsrus.co.uk or browse our full product range online here https://resinsrus.co.uk/store/

